5 Best House Plants to Grow Fast & Easy to Care For

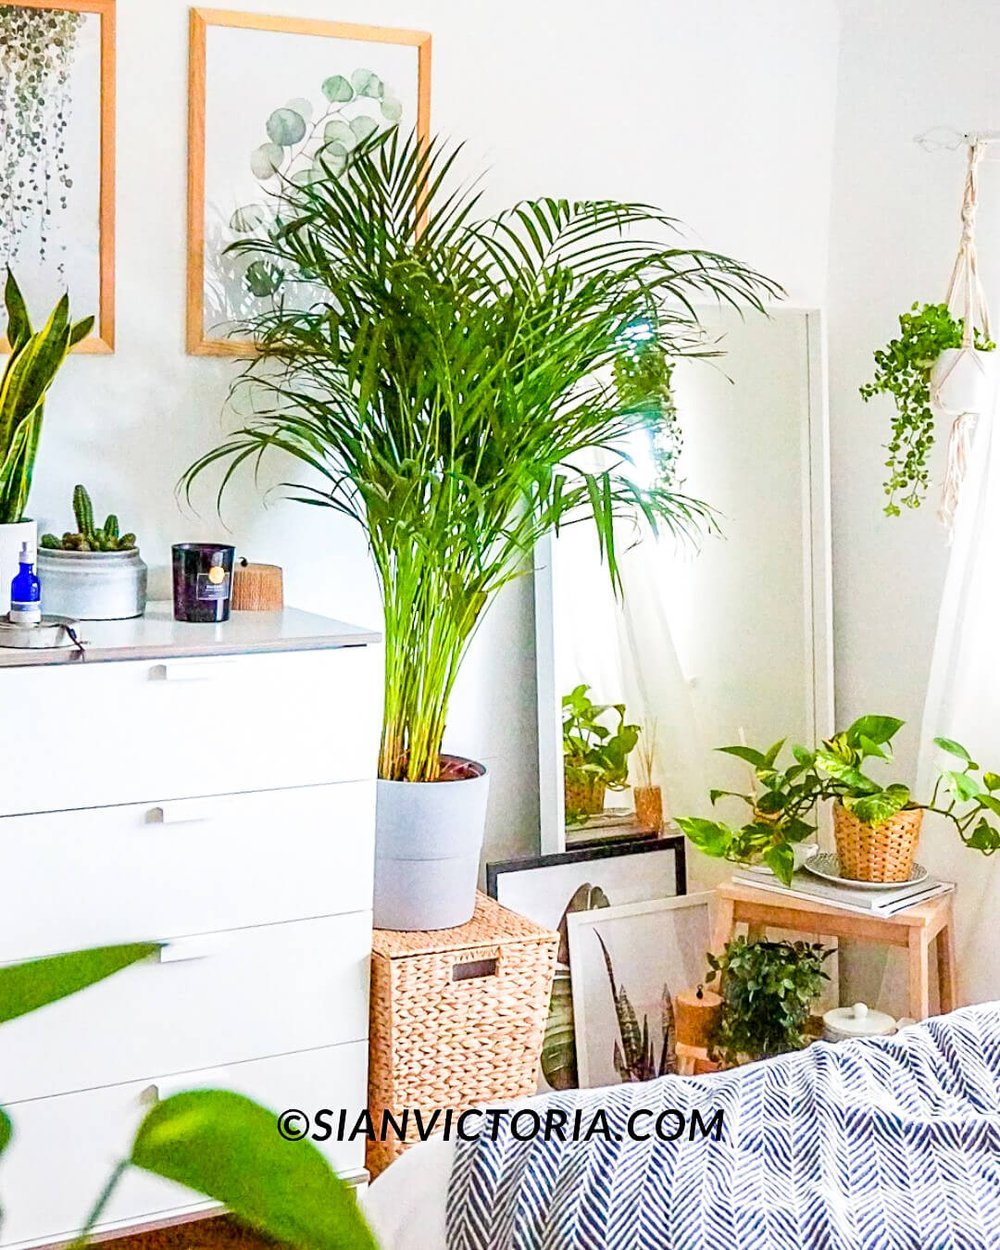
Sian Victoria © - Devils Ivy house plant, Scandinavian home interior design
Low maintenance indoor house plants
Since I can’t retire just yet and build a dream eco-home in the jungle or a treehouse in the lush green countryside somewhere near the sea. To make do for now, over the years I have been adding a variety of low maintenance houseplants to fill my brick city home with life.
Not only do plants help purify the air, but they give my mental health a boost by simply being surrounded by them and of course they improve the aesthetic of our homes interior design.
Plants clear the air by removing carbon dioxide. This is an important process of their photosynthesis which removes harmful greenhouse gases. Doing so creates a cooling effect helping to cool down our home. Plants also sweat by releasing water vapour in hot conditions to help cool the air around them.

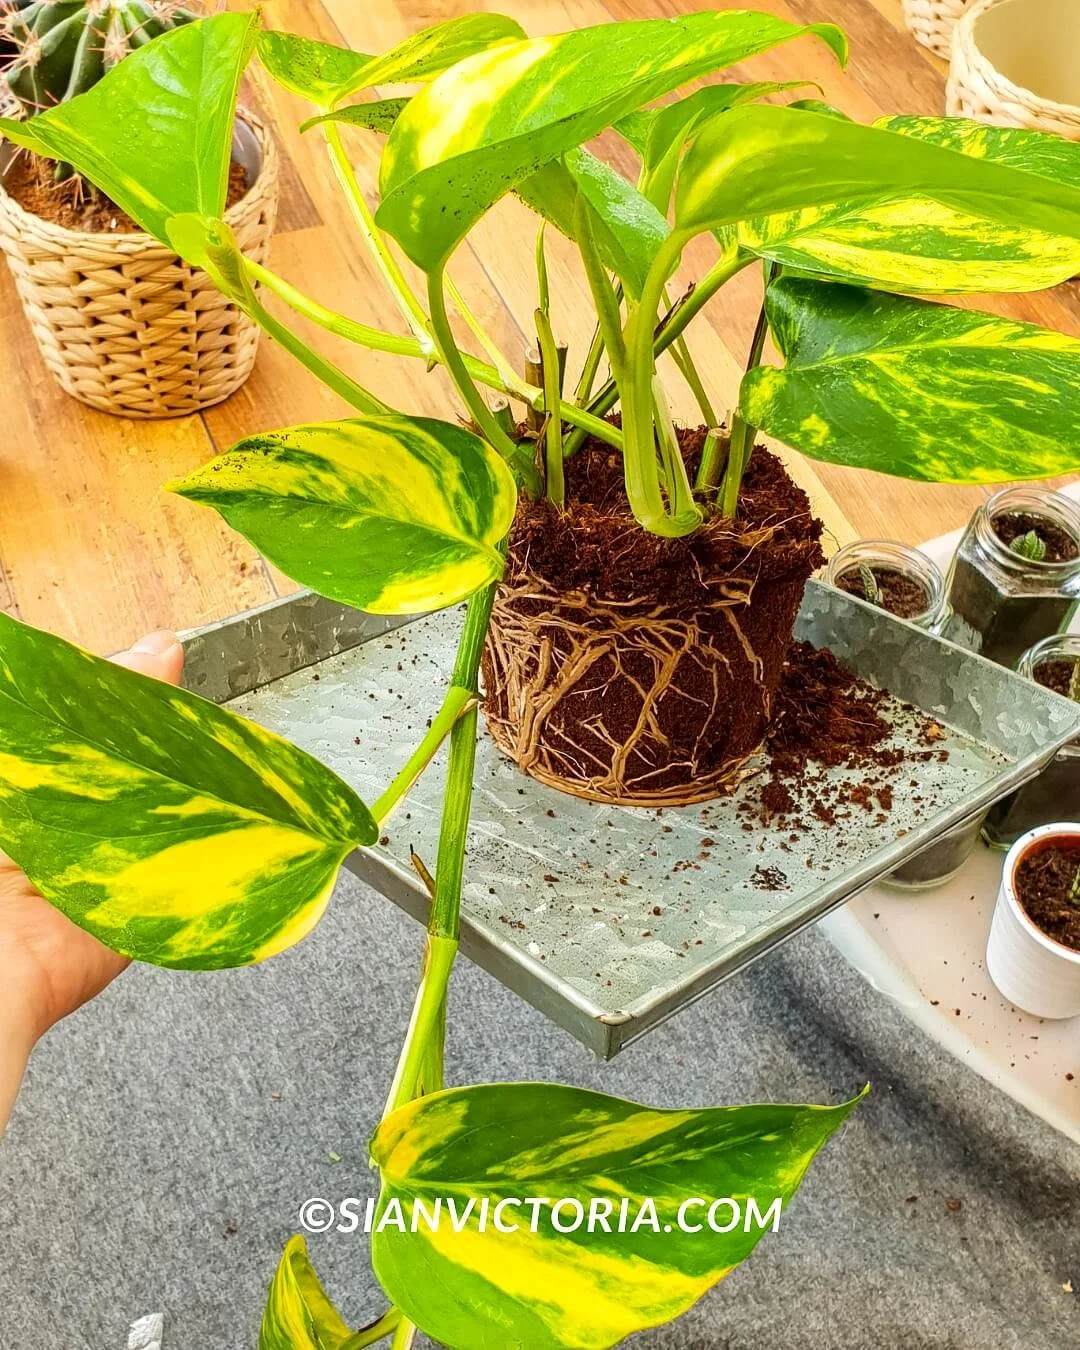
Sian Victoria © - July 2018, indoor house plant propagation
My decorating style is Scandinavian and boho inspired interiors. It’s a little bit rustic yet modern, with a neutral colour palette, featuring a variety of textures and incorporating sustainable materials such as bamboo, cork, concrete, straw, recycled cotton, organic hemp and linen as much as possible.
More so over the last year, I’ve stopped buying thing’s like ornaments and unnecessary decorative trinkets and instead have my growing plant family take pride of place in my home to add life and brighten up areas of rooms in ways that an ornament cant. Especially since an ornament is likely to be ‘unfashionable’ within a year or two. Whereas biophilic home design never goes out of style!
Sian Victoria © - February 2019, Scandinavian interior design, indoor house plants
So, if you are looking to decorate your home. Low maintenance house plants are the best investment. From my experience, these are five plants that are easy to care for, grow quickly and are perfect for propagating so that you can enjoy watching your plant family get bigger and bigger over the years from just one shop bought plant or cutting.
Before & After indoor plant propagation
Here are five of the best houseplants to care for and the before and after photos of my plant propagation journey to show you how much they have grown over the years.
If you’re looking to cool your home naturally, aloe vera and snake plants can help keep your home cooler by freshening the air and lowering the temperature slightly. These plants are great because they put out oxygen and keep the air a bit more humid, making your space feel nicer to be in. Snake plants are especially good for bedrooms since they release oxygen even at night. Aloe vera, with its juicy leaves, holds onto moisture and makes the air around it feel calmer. If you put these plants in the right spots, they can naturally make your home feel cooler and more comfortable.
1. Devils Ivy
Sian Victoria © - July 2018, Devils ivy, house plant

Sian Victoria © - October 2018, Devils ivy, house plant

Sian Victoria © - May 2019, Devils ivy, house plant

Sian Victoria © - April 2020, Devils ivy, house plant

Sian Victoria © - September 2020, Devils ivy, house plant
I’ve always had house plants. Cactuses and succulents were always my first choice as they require very little attention. However, during a shopping trip to IKEA in 2017, I felt very sorry for a discounted devils ivy plant that was lifeless and potentially heading for the trash if it wasn’t bought. So, for just £2 I didn’t hesitate to take it home with me. Within a matter of weeks of having plenty of water and light, it came back to life and began to make new roots.
By July 2018 the new roots had developed well. So, I decided to take my love for houseplants to the next level and extend my plant family by spending the day splitting up all my plants and separating them into different pots so that they had enough space to grow bigger. This meant I could create more and more plants from just one cheap plant that I originally bought from IKEA and a few supermarkets.
To propagate my devil’s ivy from the original plant, I tapped away at the soil gently so that I was left with the roots. The plant came apart into four separate parts, I then planted them individually in pots with houseplant germination soil. Before covering the roots with soil, I sprinkled rooting powder to encourage growth and give them the ‘best start in life’.
As you can see from the photos taken over the years, my four devils ivy plants have thrived. After propagation, they were put on the windowsill to grow. Now that they have grown into beautiful beasts, they are too big for the window. So, I have put them into pots that are fixed to the wall.
They do get light here but not as much as they did. However, now they have more freedom and space in bigger pots to grow so they are growing downwards at a much faster pace. This means it’s only a matter of time that they’ll be touching my head while I sleep so I will have to come up with another solution. But for now, I’m loving seeing new leaves and shoots grow as the weeks go by.
The best thing about the devil’s ivy is that they can go weeks without water, and they’ll let you know when they do need watering as the leaves go limp. Once they’ve been watered by the next day the leaves are strong again and you can see tiny droplets of water at the end of each leaf which the plant-nerd in me enjoys seeing as you know it is very much alive transporting the water from the soil down its stems and through every leaf.
2. Snake plant

Sian Victoria © - May 2019, Snake plant

Sian Victoria © - April 2020, Snake plant
Propagating plants is very much trial, and error and success can vary depending on the type of soil, water, feed and light it has as well as dependent on the type of pot that’s used. Before propagating my plants, I never did any research, I simply picked up soil from my local store and spotted the rooting powder next to it and thought I’d give it a try. I then found a bunch of glass and plastic pots from around the house that I could use for them to start growing in.
My attempt to grow cactuses was a big disaster as I ended up killing most of them as they are top-heavy with delicate thin roots so re-potting them was difficult (and painful even with gloves) as they would topple over and split and ooze out a thick liquid. Therefore, I would advise not to propagate cactuses without prior knowledge on the best way to do so.
These five plants species are the ones I have had the most success with, with relatively little effort. So, if you are new to growing plants these are the ones, I would recommend starting with first, especially the devil’s ivy and the snake plant as they are my most favourite of all.
The original snake plant was bought from IKEA for approximately £7. When I re-potted it, I used the same method as above. By firstly gently tapping away at the old soil, the snake leaves that naturally separated were then put in separate pots with a sprinkle of rooting powder. This then gave me three snake plants, that have all grown plenty of new leaves in just over a year and will soon be able to be re-potted into larger pots to encourage them to grow further as well as be split to get at least two more snake plants. This means from the original £7 plant I’ll have six plants from it in less than two years.
Yes, I could simply buy more snake plants from the shop, to grow my collection quicker. But what’s the fun in that? I get a lot more joy in watching ‘my babies’ grow knowing that I helped along the way.
3. Aloe Vera

Sian Victoria © - August 2018, Aloe Vera House plant

Sian Victoria © - June 2019, Aloe Vera House plant

Sian Victoria © - May 2019, Aloe Vera House plant (original cutting)
Like cactuses, Aloe Vera can be a little difficult to re-pot as they too are full of juice and have relatively thin stringy roots. So, they can easily become split, leak and become infected. But they are worth the extra bit of TLC as once safely potted they can rapidly begin to start making new shoots within a matter of weeks and before you know it, it will be filling the pot, so they are a fun and rewarding plant species to grow.
Like most of my plants, the original aloe vera was from IKEA, it cost around £5. I managed to split it into three separate pots, however sadly I now only have two as one got infected with Mealybugs. This can happen as Aloe Vera plants are juicy which makes them desirable for sap-sucking pests.
Mealybugs appear to look like a powdery mildew fungus that looks like white dots on the leaves. It can happen when the leaves are touching other plants or happen from being carried in from the outside, from pets or simply already be infected at the time of purchase since they are crammed on the shelves with others. So, look for white dots before buying. If they become too badly infected and begin to discolour and have holes, it’s unlikely that they can be saved.
Now that I’m aware of mealybugs, I know what I did wrong and how I can avoid it happening again. My three aloe vera plants were in three different places in my bedroom and office. But after moving my furniture around and making room for my growing plant family, I ended up putting all three aloe plants on the windowsill in touching distance of others, while also having the window open occasionally.
So, if you choose to grow Aloe Vera plants learn from my mistake and if you do spot white dots clean every trace of them by dipping a cotton bud soaked in water and a little bit of apple cider vinegar. This helped save the two remaining aloes.
4. Cylindrical Snake Plant

Sian Victoria © - April 2018, Cylindrical Snake Plant

Sian Victoria © - April 2020, Cylindrical Snake Plant

Sian Victoria © - April 2020, Cylindrical Snake Plant
Do you know those iconic tiny little pots of succulents IKEA sell in a set of three for approximately £4? Well, many years ago they were my first ever plant purchase. In July 2018 I decided to free my tiny Cylindrical Snake Plant from its miniature pot to find that the soil was encased in some sort of plant-fibre material preventing it to grow. So, I ripped the material, tapped away the old soil that it had been stuck in for years and re-potted each tube-like plant into its temporary pot that was much bigger than its original.
Along with new soil and a sprinkle of rooting powder which is also known as ‘plant hormones’, my cylindrical snake plant began to flourish rapidly creating new shoots. As it looked silly having four separate pots, I decided to re-unite the snake family by putting them all together again in one wider pot. They are now growing long, thick and wide freely not stuck to being short, slender and the same height. Each shoot is different, so they are no longer identical.
I’m already contemplating upgrading them to a bigger pot to encourage more growth as well as giving them an extra sprinkle of plant hormones so that the tiny plant that I’ve had the longest of them all can grow to its full potential.
5. Jade Crassula ovata plant
Sian Victoria © - June 2017, Jade Crassula Ovata Plant

Sian Victoria © - July 2018, Jade Crassula Ovata Plant

Sian Victoria © - April 2020, Jade Crassula Ovata Plant
As you might be able to spot from the photos, I’ve had this Jade Crassula ovate plant for as long as I’ve had the Cylindrical Snake Plant. This jade plant was originally kept in my small spare room that was once my office. However, a lot of the plants I had in there couldn’t thrive as there’s not much natural light, so I had to move them all to my bedroom which gets the evening sun beaming through the windows.
In the June 2017 photo, you can see its beautiful dark green succulent leaves that came in a tiny light blue pot I bought from IKEA for £4. Sadly, by July 2018 you can see from the photo that the leaves were shrivelled up, crispy and discoloured and most people would assume that it was dead, but I wasn’t giving up on it just yet.
Before this, I had re-potted it as it came in a tiny restrictive pot. I used the ‘ODLA’ coconut coir as a growing media from IKEA. This did not help at all and made this plant and many others worse. Some were not able to be saved before I began re-potting again in July 2018.
This time around I used germination soil, a sprinkle of rooting powder and a bigger pot and TA-DAH! the April 2020 photo speaks for itself. The roots are taller, thicker and stronger than before and the leaves are wider and more succulent. It’s grown so well that I may consider re-potting it to see if it can get any bigger.
Last winter, this Jade plant got infected with Mealybugs as it grew so wide it was touching the aloe leaves. However, moving it away and cleaning the white dots off with a cotton bud saved it. I was determined not to lose this one as I’ve had it for so long and it had already come back to life once. I wasn’t sure if it would be recoverable a second time.
Thankfully, it was unharmed by the mealybugs and now takes pride of place on my windowsill soaking up the sunshine and is looking like a super-juicy succulent.
Caring for houseplant tips

Sian Victoria © - October 2018, Scandinavian style bedroom, interior design, indoor house plants
My advice would be that when it comes to re-potting any plant, make sure the soil is loose and not tight so that this helps tiny new roots break through the soil easily. Once you’ve re-potted don’t water the plant for at least 1-2 weeks as re-potting is considered ‘stressful’ to the plant so too much change all at once isn’t good for it. For this reason, I would also keep it away from direct sunlight for the same amount of time.
In 6-12 months when the new plant stems are big and strong enough to be re-potted, or if it has outgrown its pot and you want to split them to make more. Changing the soil will give it a new burst of life as it feeds off the nutrition found naturally in the soil. I do highly recommend using rooting powder, I feel that this has been the most beneficial in helping them grow quickly.
I have previously used liquid plant food mixed with water. However, this made some plants and its soil go mouldy, so I stopped using it. For this reason, I would say purchasing ‘indoor plant food’ is not essential, my plants have thrived without it.
Although the coconut growing media looks a lot nicer, it was not at all beneficial to my plants. So, opt for an indoor houseplant germination soil and top it with the coconut growing media if you want the soil to look more aesthetic.
Also when you fill a pot with soil depending on how big it is and the length of its roots, fill the pot 50-75% and make a little dip to put it in then hold it in place as you cover it with soil ensuring that the stem is up straight.
You may also consider repurposing empty egg cartons for your indoor gardening needs. These convenient containers make perfect mini planters for starting seeds or growing small herbs. Fill each compartment with soil, plant your seeds or seedlings, and place the carton in a sunny spot indoors. Not only does this eco-friendly practice minimize waste, but it also adds a creative touch to your home decor. Customise the cartons with paint or markers for a personal flair, and enjoy watching your plants thrive in their new, repurposed homes.
Finally, I use a spray bottle to water my plants, this ensures I’m not overwatering the house plants. I do this once a week, but if the sun has been extra hot that week, I give them more so that they don’t dry up and become ‘stressed’.
To conclude
So, there you go. Hopefully you will find this post helpful for choosing and growing houseplants.


