How to Get a Golden Glow: Easy Steps to Apply Fake Self-Tan
*Products bought by me
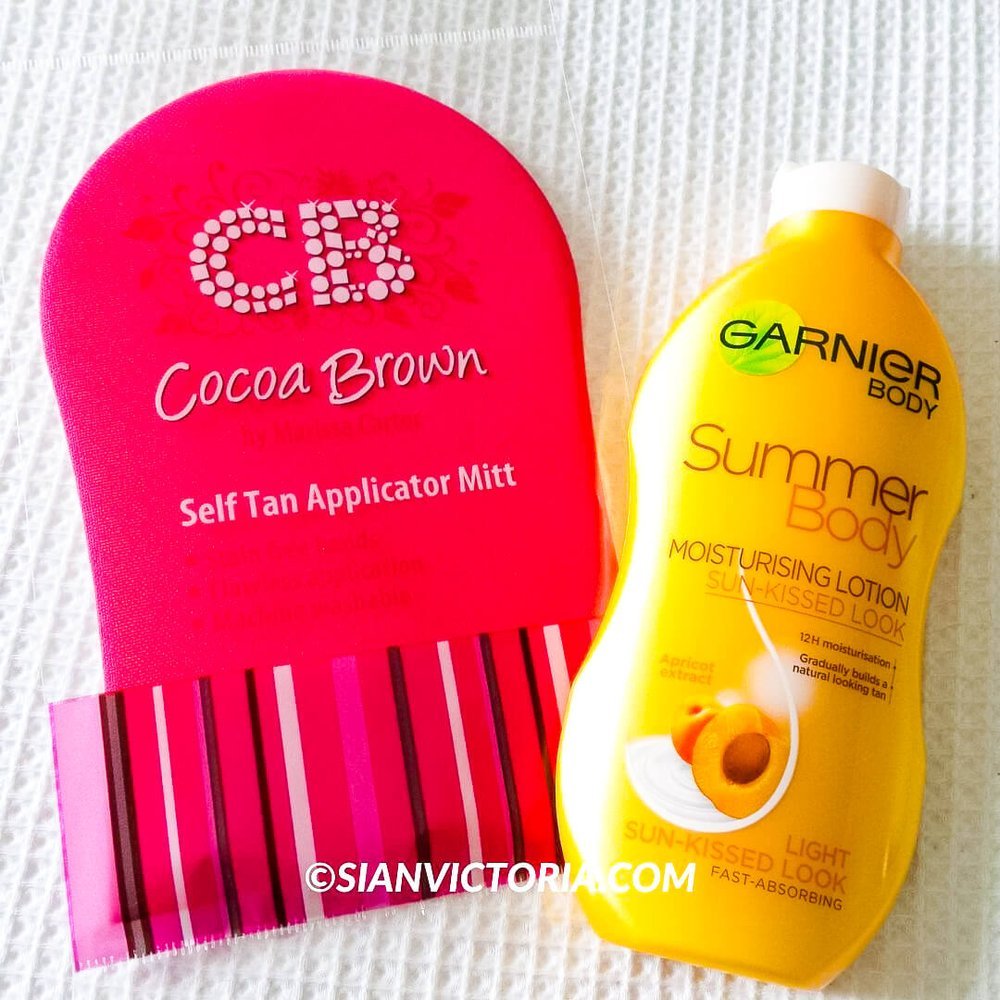
Sian Victoria © - Garnier Summer Body Gradual tan & applicator mitt
Guide on Ways to Apply Fake Tan: Tanning Tips for Beginners
Achieving a beautiful golden glow without the harmful effects of the sun can be made possible with fake tan, which is a safe and effective solution. However, applying fake tan can be challenging as no one desires a streaky or unnatural look.
For this reason, we have curated an easy guide that provides expert tips on how to apply fake tan like a pro. With just a few simple steps, you can achieve a flawless golden glow, in the comfort of your own home by following our helpful tips and tricks.
Pre-Tanning Prep: Setting the Stage for a Perfect Tan
Achieving the perfect fake tan is all about proper skin preparation. By taking the necessary steps to exfoliate, moisturise, apply barrier cream, and do any necessary hair removal, you'll be able to ensure that your tan lasts longer and looks more natural.
To begin, it's essential to exfoliate your skin with a gentle scrub or exfoliating mitt. This will remove any dead skin cells and create a smooth surface for your fake tan to adhere to. Be sure to pay extra attention to drier areas such as your elbows, knees, and ankles.
Once you've exfoliated, it's time to moisturise. This will help to hydrate your skin and prevent your fake tan from clinging to any dry patches. Choose a lightweight, oil-free moisturiser and apply it all over your body. Give it ample time to fully absorb before moving on to the next step.
Consider applying a barrier cream to areas that tend to absorb more tan, such as your knees, elbows, and ankles. This will create a protective barrier between your skin and the tanning product, preventing any unevenness or over-darkening in these areas.
Finally, don't forget to do any necessary hair removal at least 24 hours before tanning. This will prevent any potential irritation or inflammation, which can negatively affect your fake tan's final appearance.
By following these simple pre-tanning prep steps, you'll be well on your way to achieving a gorgeous, radiant golden glow.
Navigating through the Variety of Self Tanning Products
The beauty industry is inundated with countless self-tanning products, making it difficult to select the ideal one for your unique needs. From lotions and sprays to mousses and gels, the possibilities are endless, and the selection process can be overwhelming. Fortunately, there are a few simple tips to help you confidently navigate through the variety of self-tanning products to find the perfect one for your desired golden glow.
First and foremost, consider the type of formula that best suits your preferences. If you are new to self-tanning, lotions are an excellent option as they are easy to apply and provide a gradual, buildable tan. For a quick and even application, sprays are the way to go, while mousses and gels offer a lightweight texture that dries quickly. Your skin type should also be a factor when selecting a formula. If you have dry skin, choose a hydrating formula, and if you have sensitive skin, opt for fragrance-free and hypoallergenic products.
Next, determine the shade range that you wish to achieve. Self-tanning products are available in various shades, ranging from light to deep. If you have fair skin, starting with a lighter shade will help you avoid looking unnatural. On the other hand, if you have darker skin, choosing a deeper shade will give you a more dramatic tan.
Lastly, it is always beneficial to read reviews and seek recommendations from trusted sources, such as friends or beauty experts. Customer reviews offer valuable insights into the effectiveness and longevity of the product, which can guide you in making an informed decision.
Step by Step Guide to Applying your Fake Tan
Now that you have prepped your skin and chosen the perfect self-tanning product, it's time to dive into the step-by-step guide on how to apply your fake tan like a pro.
- Step 1: Start with clean, dry skin. Make sure there is no residue of lotion, oil, or sweat on your skin before applying your fake tan. This will help ensure an even application.
- Step 2: Put on some gloves. This will prevent your hands from getting stained and ensure a more even tan.
- Step 3: Begin applying your fake tan. Start from the bottom and work your way up, using sweeping motions. Use a tanning mitt or a blending brush to ensure an even and streak-free application.
- Step 4: Pay attention to tricky areas. When applying fake tan to your hands, feet, and face, use a lighter touch and blend well into the hairline, eyebrows, and jawline for a seamless finish.
- Step 5: Take your time and be patient. Allow the tan to dry completely before getting dressed or going to bed. This will prevent smudging or transferring of the product.
- Step 6: After the tan has developed, rinse off any excess product in the shower. This will reveal your beautiful, golden glow.
Remember, practice makes perfect. Don't be discouraged if you don't get it right on the first try. With some patience and these step-by-step instructions, you'll be on your way to achieving a flawless fake tan in no time.
Mistakes to Avoid for a Streak-Free Tan
To achieve a streak-free tan, it's important to know what mistakes to avoid during the application process. Here are some common pitfalls to steer clear of:
1. Not exfoliating properly: Skipping the exfoliation step can result in uneven tan application. Dead skin cells can cause patchiness, so make sure to exfoliate thoroughly before applying fake tan.
2. Neglecting to moisturise dry areas: Dry areas like elbows, knees, and ankles tend to absorb more product, leading to dark patches. Prioritise moisturising these areas to prevent an uneven tan.
3. Applying too much product: It's easy to go overboard with fake tan, but this can result in an unnatural, orange appearance. Start with a small amount and build up if necessary.
4. Neglecting to blend: Take the time to blend the product properly to avoid streaks. Use long, sweeping motions and blend well into the skin.
5. Overlooking hard-to-reach areas: Don't forget about tricky spots like the back of your knees, the tops of your feet, and your underarms. These areas can be easily missed, resulting in an uneven tan.
6. Rushing the drying process: It's crucial to allow the tan to dry completely before getting dressed or going to bed. If you rush the drying process, you risk smudging or transferring the product.
Caring for Your Tan: Tips for Maintaining that Golden Glow
Now that you have your perfect sun-kissed glow, it's essential to know how to care for it to make it last as long as possible. Here are some tips for maintaining that radiant, bronzed complexion:
- Moisturise regularly: Keeping your skin hydrated is crucial for maintaining your tan. Apply a moisturiser every day, preferably one that contains ingredients like aloe vera or shea butter, which can help prolong the life of your tan.
- Avoid excessive exfoliation: While regular exfoliation is important before applying fake tan, it's best to avoid harsh exfoliants after you've achieved your desired tan. Gentle exfoliation once a week is sufficient to keep your skin smooth without stripping away your tan.
- Steer clear of chlorine: Chlorine in swimming pools can fade your tan faster. If you plan to take a dip, apply a waterproof sunscreen and rinse off afterwards to minimise the impact of chlorine on your tan.
- Skip hot showers: Hot showers and baths can strip away your tan more quickly. Opt for lukewarm water instead and avoid using harsh soaps or shower gels, as they can also contribute to tan fading.
- Use a gradual tanning moisturiser: To extend the life of your tan, consider using a gradual tanning moisturiser. These products provide a subtle tan boost with each application and can help maintain your golden glow for longer.
By following these simple tips, you'll be able to enjoy your flawless fake tan for as long as possible.
Best Budget Gradual Tan Lotions
Having equipped you with the necessary pointers to achieve a flawless self-tan, I have handpicked an affordable and readily available option for you to consider. Alternatively, if you seek a mid-range tanning products you may find my St Tropez gradual tan review or the Utan & Tone Self-tan helpful.
Garnier Summer Body Gradual Fake Tan Lotion Review
My prior experience with using fake tans was not pleasant. Given my oily to combination skin type, they often caused breakouts, smelt unpleasant, and felt too oily on my skin. Therefore, I ceased using them. The last time I tried a fake tan was a few years ago, and last year, during the summer, I used sunbeds, which I loathe doing for evident reasons.
However, I have resolved to stay away from sunbeds entirely, as my Nan was diagnosed with basal cell carcinoma, a form of skin cancer. My family has very fair skin, which makes exposure to UV rays more hazardous, as I've detailed in my summer skin tips and my before and after UV spots skin results post.
I frequently use Garnier products, and they usually work well for me. So I opted for the Garnier Summer Body Sun-kissed look moisturising lotion. I paid about £5 for it at Boots, so it was reasonably priced, and I've since read some favourable reviews. As I am only seeking a natural tan to feel more comfortable during summer with my legs exposed, this product has been ideal for me, and I've been able to achieve the desired appearance.
Before applying the product, I make sure to exfoliate my entire body with my favourite Soap & Glory breakfast body scrub. Then, I shave my legs and use my in-shower body lotion. When exfoliating, I ensure to target my elbows, knees, and feet since they tend to dry out the most. The in-shower lotion leaves my skin soft, which makes it easier for the fake tan to glide on smoothly, blend evenly, and avoid breakouts. This method has been effective for me thus far.
When I am dry and ready to apply the fake tan, I generously apply the lotion onto the tan applicator mitt, which I bought from Primark for £3. I then smooth the lotion onto my feet and work my way up. Beginning from the bottom and working upward, reduces the likelihood of creases on my stomach when I bend down to apply the product on my legs. I apply the fake tan in a cool room and wait for it to dry entirely before getting dressed. Applying it in a hot or humid room could lead to a streaky tan due to sweat.
I apply the fake tan in circular motions first and then rub it upwards, making sure to go over my legs to ensure even coverage and avoid missing any areas. I do one body part at a time. The moisturising lotion has a delightful fragrance. Although it is initially strong, it soon becomes a lightly scented apricot smell. This product and application method have given me a natural sun-kissed radiant glow without any streaks, creases, or darker patches.
I've been using the gradual tanner after every shower and applying generous amounts each time. As a result, I've been using up the bottle quickly. So, I plan to purchase the larger 400ml bottle the next time I visit a chemist, as it will last longer and be more cost-effective.
Both the Garnier tan and tanning mitt have been successful for me, and I am satisfied with the outcomes. For my face, I've been using the No7 Naturally Sunkissed Gradual Tan, which has also worked well.
*SHOP THE POST
Get a gorgeous bronze glow with these essential products for a perfect fake tan! Start by prepping your skin with the gentle yet effective St. Ives Soothing Oatmeal Scrub. If you're new to self-tanning, try the foolproof Jergens Natural Glow Mousse for a natural-looking tan. For a deeper tan, consider the customisable option of Isle of Paradise Self-Tanning Drops. To apply your chosen tanner flawlessly and avoid streaks, use the Coco & Eve Self Tanning Mitt. Keep your glow going with Australian Gold Gradual Lotion, and when it's time for a refresh, Tan-Luxe Buffing Remover can help you achieve an even fade.